
Paint Protection Film Installation Process: Step-by-Step Guide
Installing Paint Protection Film is a detailed process that requires proper preparation, precision and professional installation techniques. From cleaning and preparing the vehicle's paint to applying the film and finishing the edges, every step plays an important role in achieving a smooth, durable and professional result.
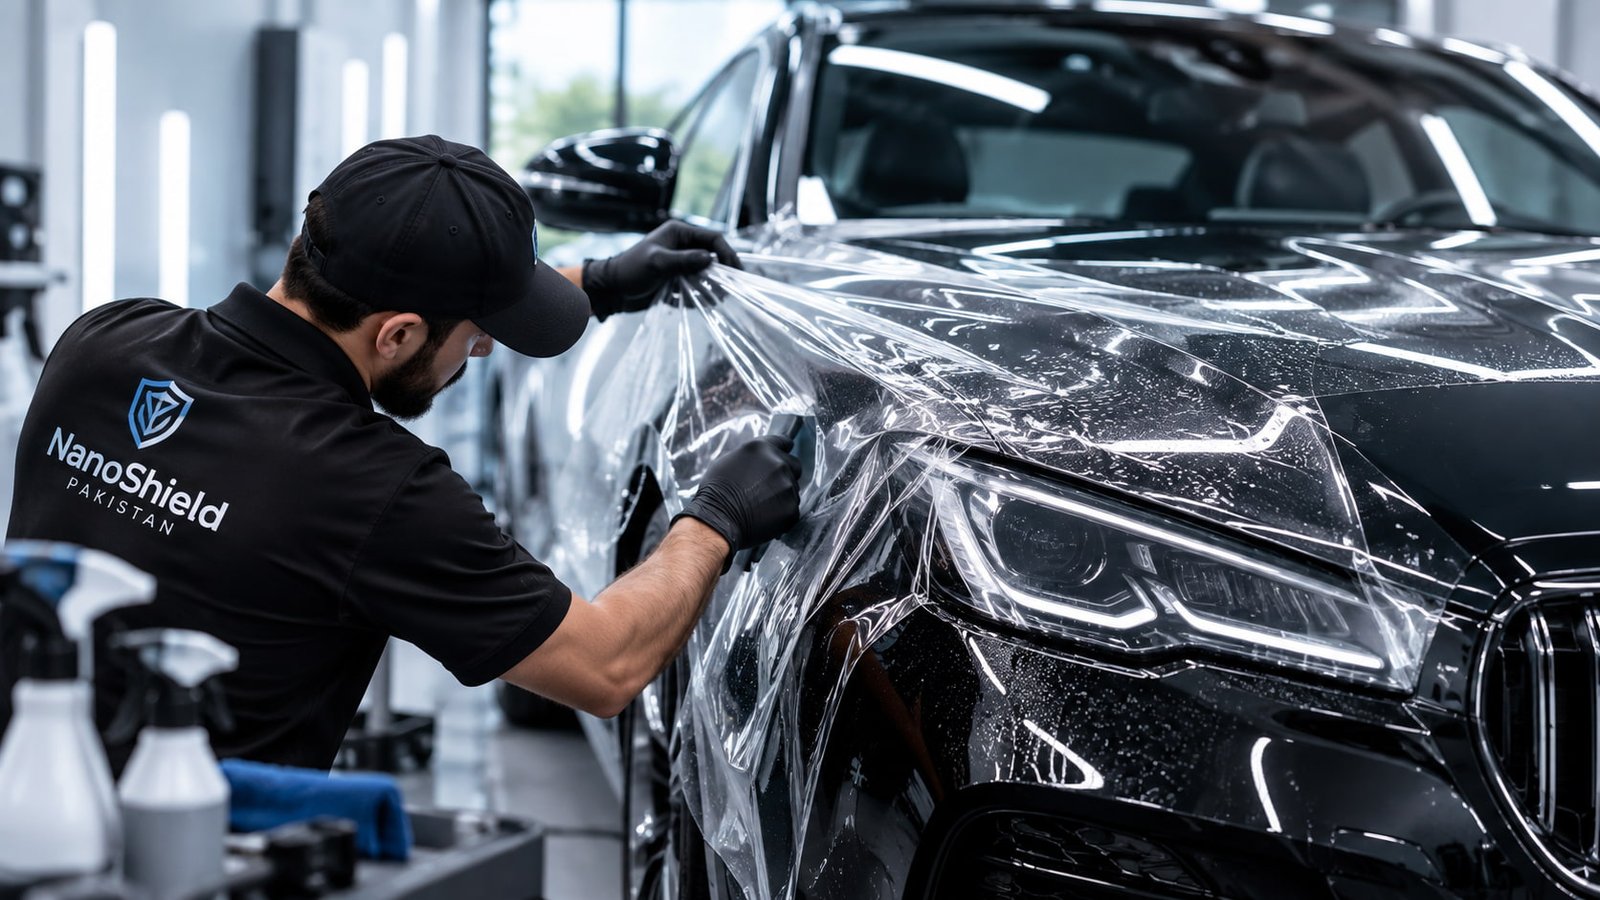
What Is the Paint Protection Film Installation Process?
The Paint Protection Film installation process involves carefully preparing the vehicle's exterior before applying a transparent protective film over selected painted surfaces. The goal is to create a clean, smooth and properly fitted layer of protection without affecting the original appearance of the vehicle.
A professional installation normally includes vehicle inspection, deep cleaning, paint preparation, film positioning, application, edge finishing and a final quality inspection. Each stage helps ensure that the Paint Protection Film looks clear and remains securely bonded to the vehicle's paint.
What Happens Before Paint Protection Film Installation?
Before the actual installation begins, the vehicle needs to be properly inspected and prepared. Professional Paint Protection Film installation is not simply a matter of placing a film over the paint. The condition of the vehicle's surface, cleanliness of the paint and preparation of every panel can directly affect the final appearance and durability of the installation.
A professional installer normally follows several preparation steps before applying the film. These steps help remove dirt, dust, oils, road contamination and other surface imperfections that could become visible underneath the film. Proper preparation also helps the film achieve better contact with the vehicle's painted surface.
Vehicle Inspection
The first step is a detailed inspection of the vehicle. The installer checks the paint condition, existing scratches, stone chips, dents, repainting, contamination and other surface imperfections.
This inspection is important because applying film over damaged or heavily contaminated paint may affect the final appearance. Any existing paint defects should be identified before installation begins.
Thorough Washing
The vehicle is thoroughly washed to remove loose dirt, dust, mud and road grime from the exterior. Special attention is usually given to areas around the bonnet, bumpers, mirrors, wheel arches, doors and other panels where contamination can collect.
A clean surface is essential because even small particles trapped underneath the film can affect the appearance of the finished installation.
Paint Decontamination
After washing, the paint may still contain bonded contaminants that normal washing cannot completely remove. Professional preparation may include additional decontamination to help create a cleaner and smoother surface.
Removing these contaminants helps reduce the possibility of particles or surface contamination interfering with the application of the protective film.
Paint Correction When Needed
If the vehicle has noticeable swirl marks, light scratches, oxidation or other paint imperfections, paint correction may be recommended before installing Paint Protection Film .
The purpose is to improve the condition of the paint before the transparent film is installed. Because the film is clear, existing imperfections can remain visible after installation if they are not addressed beforehand.
Surface Cleaning
Once the paint has been prepared, the installer carefully cleans the surface to remove remaining oils, residues and moisture. The goal is to create a clean surface suitable for accurate film application.
Particular attention is paid to panel edges, body lines, corners and areas around lights and trim because contamination in these locations can make installation more difficult.
Final Preparation Check
Before the film is positioned, the installer performs a final inspection of the prepared panel. The surface should be clean, smooth and free from visible contamination that could interfere with the installation.
Taking time during preparation can make the application process more controlled and can help achieve a cleaner and more professional-looking finish.
Why Is Proper Preparation Important?
Proper preparation is one of the most important parts of the Paint Protection Film installation process. A high-quality film cannot compensate for a poorly prepared surface. Dust, dirt, oil or bonded contamination underneath the film may affect its appearance and can make certain areas more difficult to install correctly.
Professional preparation also allows the installer to identify existing paint problems before the film is applied. This is particularly important for new and high-value vehicles where the owner wants the finished result to look as clean and seamless as possible.
Step 1 – Vehicle Inspection & Paint Condition Check
Before applying Paint Protection Film, a professional installer first examines the vehicle carefully. This step is important because the condition of the paint can affect both the appearance of the finished installation and the way the film sits on the surface.
The inspection is normally carried out under good lighting so the installer can identify scratches, swirl marks, stone chips, oxidation, stains, dents, previous repairs and other visible imperfections. The installer may also inspect panel edges, body lines, door handles, mirrors, headlights and other areas where film installation requires additional attention.
Why This Inspection Matters
Paint Protection Film is transparent, so the condition of the paint underneath the film can remain visible after installation. Identifying existing imperfections before installation helps the owner and installer decide whether additional paint preparation is required.
What Does the Installer Check?
A detailed inspection helps determine whether the vehicle is ready for film installation or whether some preparation should be completed first. Different vehicles can have very different paint conditions, even when they appear clean from a normal viewing distance.
Scratches & Swirl Marks
Light scratches, wash marks and swirl marks may be visible on glossy paint. Because the film is transparent, these imperfections can still be noticeable after the film is installed. The installer evaluates their severity before continuing.
Stone Chips & Paint Damage
The front bumper, bonnet and front fenders often experience stone chips and road debris impacts. Existing chips and damaged areas should be identified before installation so the owner understands the current condition of the paint.
Previous Paint Repairs
The installer may check whether any panel has been repainted or repaired previously. Repainted surfaces can have different characteristics from factory paint, so identifying these areas before installation is an important part of the inspection process.
Contamination on the Paint
Road tar, tree sap, industrial fallout, grease and other bonded contaminants can remain on the surface even after a normal wash. These contaminants need to be identified and removed during the preparation stage.
Panel Edges & Body Lines
Edges, corners, curves and body lines require careful attention during film installation. Inspecting these areas beforehand allows the installer to plan the application and finishing process more accurately.
Overall Paint Condition
Finally, the installer evaluates the overall condition of the vehicle's exterior. This helps determine whether standard cleaning is sufficient or whether additional preparation such as paint correction may be beneficial before applying the protective film.
Should Paint Correction Be Done Before PPF?
Paint correction is not automatically required for every vehicle. It depends on the condition of the paint and the result the vehicle owner wants to achieve. A new vehicle with clean and well-kept paint may require only proper washing and surface preparation before film application.
On the other hand, an older or heavily used vehicle may have visible swirl marks, light scratches, oxidation or other imperfections. In these situations, paint correction may be considered before installing Paint Protection Film.
The main reason is simple: once a transparent protective film is installed, the paint underneath it remains visible. Correcting suitable imperfections beforehand can therefore help produce a cleaner and more refined final appearance.
Professional Tip
Always inspect the paint before installation rather than assuming that a vehicle is ready just because it looks clean. Proper inspection allows the installer to identify potential issues early and choose the appropriate preparation process for each panel.
Final Check Before Installation
Once the inspection is complete, the installer can determine the next preparation steps. Any necessary cleaning, decontamination or paint correction can then be completed before the film is applied. This preparation stage helps create the cleanest possible surface for the installation process.
Step 2 – Thorough Car Washing & Deep Cleaning Before PPF
After the initial vehicle inspection, the next important stage is thorough washing and deep cleaning. Before applying Paint Protection Film, the vehicle's exterior must be as clean as possible. Dust, mud, road grime, grease, insects, tree sap and other contamination can make the installation more difficult and may affect the final appearance of the film.
Professional PPF installation requires more than a quick exterior wash. The installer pays close attention to the panels that will receive the film and carefully cleans areas where dirt and contamination commonly collect. A properly prepared surface allows the installer to work with greater precision during the application stage.
Clean Paint Is Essential for a Professional Finish
Even small particles can become noticeable when a transparent protective film is applied over them. Thorough cleaning helps create a cleaner working surface and reduces the chance of visible contamination affecting the finished installation.
What Is Included in the Washing & Cleaning Stage?
The exact preparation process can vary depending on the vehicle's condition, but professional installation normally involves several cleaning stages. Each stage has a specific purpose and helps prepare the vehicle for the next step of the PPF installation process.
Pre-Rinse the Vehicle
The vehicle is first rinsed thoroughly to remove loose dust, mud and road debris from the exterior. This initial rinse is important because washing a heavily contaminated surface immediately can move loose particles across the paint.
Special attention can be given to the front bumper, bonnet, lower panels, mirrors and other areas that commonly collect road contamination.
Exterior Wash
After the initial rinse, the vehicle is carefully washed to remove remaining dirt and surface grime. A suitable automotive cleaning solution and soft washing equipment can be used to minimize unnecessary contact with the paint.
The objective is to leave the exterior visibly clean before more detailed preparation begins.
Cleaning Panel Edges
Dirt and residue can collect around panel gaps, edges, badges, trim pieces, door handles and other tight areas. These locations require additional attention because contamination near an installation edge can interfere with a clean finish.
Removing Road Grime
Areas exposed to road traffic can contain grease, tar, insects and other contaminants. These deposits may not disappear during a basic wash and therefore may require additional cleaning before the surface is ready for film application.
Cleaning Glass & Trim Areas
Glass, exterior trim and surrounding areas may also be cleaned carefully during preparation. Keeping the installation area clean helps prevent contamination from being transferred back onto the prepared paint surface.
Final Surface Rinse
After the main cleaning stage, the vehicle is rinsed again to remove remaining cleaning residue and loosened contamination. The panels can then be inspected before moving on to deeper paint decontamination.
Why Can a Normal Car Wash Be Not Enough?
A normal car wash is designed to make a vehicle look clean for everyday use, while PPF preparation requires a much more controlled level of surface cleanliness. A vehicle can look clean to the eye and still have bonded contaminants or residue on the paint.
Since the protective film is transparent, contamination trapped between the film and paint can become visible after installation. For this reason, professional installers normally spend additional time preparing the surface before applying the film.
Professional Installation Tip
Do not rush the washing stage. The quality of the final PPF installation depends heavily on preparation. Taking additional time to clean the vehicle properly can make the following installation stages easier and help achieve a cleaner overall finish.
What Happens After Deep Cleaning?
Once the vehicle has been thoroughly washed and cleaned, the installer moves to the next preparation stage: removing bonded contaminants that may still remain on the paint. This can include substances that cannot be removed through normal washing alone.
After the surface has been properly decontaminated, the installer can perform a final inspection and prepare the panels for accurate film application. This step-by-step approach helps create a cleaner foundation for Paint Protection Film.
Step 3 – Paint Decontamination Before PPF Installation
After the vehicle has been thoroughly washed, the next stage is paint decontamination. A car can look perfectly clean after washing while still having bonded contaminants attached to the paint. These contaminants may include road tar, tree sap, industrial fallout, brake dust particles, mineral deposits and other substances that normal washing may not completely remove.
Removing these contaminants is an important part of preparing the surface for Paint Protection Film. The objective is to create a cleaner and smoother surface so the installer can work with greater precision during the film application process.
Why Paint Decontamination Matters
Bonded contamination can remain attached to the paint even when the vehicle appears clean. If these contaminants are not properly addressed, they can make the surface less suitable for precise film application and may affect the appearance of the finished installation.
Common Contaminants Removed Before PPF
Different types of contamination can build up on a vehicle depending on where and how it is driven. A professional installer examines the paint and selects an appropriate preparation method based on the condition of the surface.
Road Tar
Tar and asphalt residue can stick to lower body panels, wheel areas, doors and other parts of the vehicle. These deposits can be difficult to remove through normal washing alone.
Before film application, visible tar contamination should be properly addressed so the prepared surface is as clean as possible.
Tree Sap
Tree sap can become strongly attached to automotive paint, especially when it remains on the vehicle for an extended period. It may leave sticky residue or visible marks on the surface.
Proper removal helps prevent residue from interfering with the preparation and installation process.
Iron & Brake Dust Particles
Vehicles can accumulate tiny iron-containing particles from road environments and brake systems. Some of these particles can become bonded to the paint and may not be removed by a regular wash.
The surface should be evaluated and appropriately decontaminated before proceeding with film installation.
Mineral Deposits
Water spots and mineral deposits can develop when water containing dissolved minerals dries on the paint. Depending on their severity, these deposits may require additional cleaning before the surface is ready.
Industrial Fallout
Environmental fallout can settle onto vehicle paint and gradually become bonded to the surface. These microscopic contaminants may not be obvious during a quick visual inspection.
Proper decontamination helps create a cleaner surface for the next stage of installation.
Sticky Residue & Oils
Oils, adhesive residue and other substances may remain on the exterior from previous products, road use or environmental exposure. These residues should be removed before the final surface preparation.
How Is Paint Decontamination Performed?
The exact decontamination process depends on the type and amount of contamination present on the vehicle. Professional installers may use suitable automotive-safe products and controlled cleaning techniques to remove contamination without unnecessarily affecting the paint.
The process should be performed carefully because the goal is not simply to make the vehicle look clean. The objective is to prepare the surface for a precise and clean installation of the protective film.
Identify the Contamination
The installer first determines what type of contamination is present on the paint and which areas require additional attention.
Use the Appropriate Cleaning Method
A suitable method is selected for the specific contamination. Different residues may require different cleaning approaches rather than one product being used for everything.
Rinse & Inspect the Surface
After decontamination, the surface is cleaned and inspected again to ensure that remaining contamination has been addressed before moving forward.
Prepare for Final Cleaning
Once the major bonded contamination has been removed, the installer can continue with the final surface preparation before positioning the PPF.
Can PPF Be Installed Without Decontamination?
In some cases, a vehicle may already have a relatively clean surface, but skipping proper preparation simply because the paint looks clean is not ideal. The level of decontamination needed depends on the actual condition of the vehicle.
A professional installer should evaluate the surface rather than following the same preparation routine for every vehicle. This allows the preparation process to be adjusted according to the vehicle's age, usage, paint condition and amount of contamination.
Professional Tip
Never assume that clean-looking paint is completely contaminant-free. Proper inspection and decontamination can make a significant difference in preparing the vehicle for a high-quality PPF installation.
Final Surface Check After Decontamination
Once the decontamination stage is complete, the installer checks the panels again. The surface should be visibly clean and free from remaining contamination that could interfere with the next stage of preparation.
After this stage, the vehicle is ready for more detailed surface cleaning and preparation before the protective film is positioned. Careful preparation at this point helps establish a clean foundation for the rest of the installation process.
Step 4 – Paint Correction Before PPF Installation
After washing and decontaminating the vehicle, the next stage is evaluating whether paint correction is required. Paint correction is not necessary for every vehicle, but it can be an important preparation step when the paint has visible swirl marks, light scratches, oxidation, water spots or other imperfections.
Because Paint Protection Film is transparent, the original paint remains visible underneath the film. This means that existing imperfections may still be noticeable after installation if they are not addressed beforehand. For this reason, a professional installer should evaluate the paint condition before deciding whether correction is appropriate.
Is Paint Correction Always Required?
No. Paint correction depends on the vehicle's current paint condition and the finish the owner wants to achieve. A clean vehicle with excellent paint may need only proper preparation, while a vehicle with visible imperfections may benefit from correction before the protective film is installed.
What Paint Imperfections Can Be Addressed?
During the inspection, the installer can identify different types of surface imperfections. The appropriate level of correction depends on the condition of the paint, the depth of the defect and the desired final appearance.
Swirl Marks
Swirl marks are fine circular or spider-web-like marks that are commonly caused by improper washing and drying techniques. They can become especially noticeable on darker paint under direct lighting.
Suitable paint correction can improve the appearance of these surface marks before the transparent film is installed.
Light Surface Scratches
Some light surface scratches may be suitable for correction depending on their depth and location. The installer should inspect the defect carefully rather than assuming that every scratch can be completely removed.
Oxidation
Older or poorly maintained paint can develop oxidation that reduces gloss and makes the surface appear dull. When appropriate, paint correction may help improve the finish before PPF installation.
Water Spots
Mineral deposits and water spotting can sometimes leave visible marks on automotive paint. Their severity should be evaluated before installation, especially when the vehicle is expected to have a highly refined final appearance.
Paint Haze & Dullness
Some vehicles may have a hazy or less-reflective appearance caused by surface wear, incorrect polishing or environmental exposure. Proper preparation can help improve the visual condition of suitable surfaces.
Previous Polishing Marks
Previous polishing or detailing work can sometimes leave uneven finishing marks or holograms. These should be identified during inspection and addressed where appropriate before the film is installed.
Why Correct the Paint Before Installing PPF?
The main reason for correcting suitable paint imperfections before installation is that the protective film does not hide every defect underneath it. Since the film is designed to remain transparent, the condition of the paint can continue to influence the overall appearance.
Installing the film over a well-prepared surface can therefore help create a cleaner and more refined result. This is particularly important when the vehicle owner wants a high-gloss, showroom-style appearance after installation.
Cleaner Appearance
Improving suitable surface imperfections before installation can help the paint look cleaner underneath the transparent film.
Better Final Finish
A properly prepared surface can contribute to a smoother and more refined overall appearance once the installation is complete.
Better Preparation
Paint correction can be part of a broader preparation process when the existing condition of the vehicle requires additional attention.
Paint Correction vs Paint Repair
It is important to understand that paint correction and paint repair are not the same thing. Paint correction generally focuses on improving suitable surface-level imperfections, while deeper damage may require a different type of repair.
Deep scratches, exposed primer, significant stone-chip damage, dents or serious paint defects may not be corrected through normal polishing alone. These conditions should be assessed separately before the PPF installation process continues.
Important Before Installation
Paint correction should be based on the actual condition of the vehicle rather than performed automatically on every car. A professional assessment helps determine whether correction is beneficial and what level of preparation is appropriate.
Final Surface Preparation After Paint Correction
If paint correction is performed, the vehicle should then go through the appropriate final cleaning and surface preparation before film application. Polishing can leave residues that need to be properly removed before the installer begins positioning the protective film.
Once the paint has been inspected, cleaned and properly prepared, the vehicle is ready to move into the next stage of the installation process: preparing the PPF pattern and determining how the film will be positioned on each panel.
Step 5 – PPF Pattern Selection & Preparation
Once the vehicle's paint has been properly inspected, washed, decontaminated and prepared, the next stage is selecting the appropriate pattern for each panel. Pattern selection is an important part of the Paint Protection Film installation process because the film needs to follow the shape and design of the vehicle as accurately as possible.
Professional installers may use pre-designed patterns, custom patterns or a combination of both, depending on the vehicle and the installation requirements. The objective is to achieve accurate coverage while maintaining clean lines, proper alignment and a professional appearance around edges, curves and body contours.
Why Pattern Selection Is Important
Every vehicle has its own body shape, curves, panel dimensions and design details. A properly selected pattern helps the installer position the protective film accurately and plan how the film will be finished around edges, corners, lights, trim and other areas.
What Is a PPF Pattern?
A PPF pattern is a template designed to match a specific vehicle panel. Instead of applying a random piece of film and cutting directly on the vehicle, installers can use a suitable pattern to help control the shape and placement of the material.
Patterns can be prepared for individual panels such as the bonnet, front bumper, fenders, mirrors, doors, rocker panels and other areas. The exact coverage depends on the package selected and the installation strategy used by the professional installer.
Vehicle Model Selection
The installer first identifies the exact vehicle make, model and body style. This is important because different model years, trims and body configurations can sometimes have different panel shapes or design details.
Panel Identification
The areas being protected are identified before the film is prepared. A partial front package may focus on high-impact areas, while a larger package can include additional painted panels across the vehicle.
Pattern Accuracy
The installer checks that the selected pattern corresponds correctly with the vehicle panel. Accurate sizing and shape help reduce unnecessary stretching and make positioning more controlled during installation.
Coverage Planning
Before application, the installer determines how much of each panel should be covered and how the film will be positioned. This helps create consistent coverage across the selected areas.
Edge & Corner Planning
Curves, corners and panel edges require additional attention. The installer considers how the film will finish around these areas to achieve a clean and visually consistent result.
Final Pattern Check
Before the film is applied, the selected pattern and panel are checked again. This final review helps the installer confirm positioning and prepare for the application stage.
Pre-Cut PPF Patterns vs Custom Installation
There are different approaches to preparing PPF for installation. Pre-designed patterns can provide a structured template for specific vehicle models, while custom pattern work can be useful when a particular vehicle, panel or coverage requirement needs a more tailored approach.
The best method depends on the vehicle, the condition of the panels, the desired coverage and the installer's experience. A professional installer should select the approach that provides accurate coverage while maintaining a clean final appearance.
Pre-Designed Patterns
Vehicle-specific patterns are prepared in advance for particular models and panels. They can help provide consistent shapes and make the application process more organized.
Custom Pattern Work
Custom pattern work allows the installer to adapt coverage to specific vehicle requirements. This can be useful for unusual panels, modified vehicles or customized coverage requests.
Why Accurate Alignment Matters
Correct alignment is essential for a professional-looking installation. The film should follow the panel's natural shape and maintain consistent positioning around body lines and important design features.
Poor alignment can result in uneven coverage, visible edges or unnecessary material movement during installation. Careful pattern selection and positioning give the installer better control before the application begins.
Accurate Panel Coverage
Proper pattern selection helps the film match the intended panel and coverage area.
Cleaner Installation
A well-prepared pattern can make positioning and application more controlled.
Better Edge Planning
Proper planning helps the installer manage curves, corners and panel edges more effectively.
Professional Tip
Pattern selection should never be rushed. The installer should verify the vehicle model, panel shape, coverage requirements and positioning before beginning the actual film application. Good preparation makes the next stage of installation more controlled and predictable.
Ready for the PPF Application Stage
Once the correct pattern has been selected and the installation area has been prepared, the installer can move to the actual film application. At this stage, the vehicle surface should be clean and ready, while the film should be correctly prepared for the selected panel.
The next stage involves carefully positioning the film over the vehicle panel and working it into the correct shape. This is where installer experience, precision and proper application technique become especially important.
Step 6 – PPF Film Application Process
After the vehicle has been properly prepared and the correct pattern has been selected, the next stage is the actual application of the protective film. This is one of the most important parts of the Paint Protection Film installation process because the film must be positioned, aligned and applied carefully across the vehicle panel.
Professional PPF application requires patience, precision and experience. The installer works with the film and the vehicle panel together to achieve smooth coverage while managing curves, body lines, corners and edges. The exact technique can vary depending on the film, panel shape and installation method.
Precision Is the Key to PPF Installation
Correct positioning and controlled application help the installer achieve a clean and consistent finish. The film should be handled carefully throughout the process to minimize contamination, wrinkles and unwanted movement during installation.
How Is PPF Applied to a Vehicle Panel?
The application process is performed panel by panel. The installer prepares the selected piece of film, positions it over the prepared surface and carefully works it into place. Special attention is required on curved surfaces and areas where the vehicle's body design changes direction.
Prepare the Film
The selected piece of PPF is prepared according to the panel being protected. The installer confirms that the film corresponds with the intended coverage area before beginning the application.
Position the Film
The film is carefully positioned over the prepared panel. Correct positioning at the beginning is important because it establishes the alignment for the rest of the application.
The installer checks the panel edges, body lines and important design features before continuing.
Begin Controlled Application
Once the film is correctly positioned, the installer begins working the material onto the surface in a controlled manner. The goal is to maintain consistent contact while keeping the film properly aligned.
Work Across the Panel
The installer gradually works across the panel rather than attempting to apply everything at once. This controlled approach helps manage the film around curves, contours and changing panel shapes.
Manage Curves & Contours
Modern vehicle panels often contain deep curves, sharp body lines and complex shapes. These areas require careful handling so the film follows the panel correctly without creating unnecessary distortion or visible imperfections.
Check Alignment During Application
The installer continuously checks the position of the film while working across the panel. If alignment needs adjustment, it can be corrected during the appropriate stage of the application rather than waiting until the entire panel is finished.
Why PPF Installation Requires Experience
Applying a transparent protective film to a vehicle is more complicated than simply placing a sheet over the paint. Automotive panels have different shapes, curves and contours, and each area can require a different application approach.
An experienced installer understands how to position the material, manage the film around difficult areas and maintain a consistent finish. Experience is especially valuable when working on complex bumpers, mirrors, headlights, deep curves and other detailed sections.
Accurate Positioning
Proper positioning helps keep the film aligned with the intended panel coverage and vehicle design.
Controlled Application
Working gradually across the panel allows the installer to manage the film more carefully around curves and contours.
Clean Final Appearance
Careful installation can help create a smooth and visually consistent protective layer over the vehicle's paint.
How Are Bubbles, Wrinkles & Imperfections Managed?
During installation, the installer carefully manages the film as it is applied to the panel. Small areas may need to be adjusted during the process to maintain proper contact and alignment. The installer works progressively rather than rushing through the application.
The exact handling method depends on the film and installation technique being used. The important objective is to maintain controlled application and avoid leaving unwanted imperfections in the finished installation.
Professional Installation Tip
Do not judge the quality of a PPF installation only by how quickly the film is applied. Professional installation is about accuracy, preparation, controlled application and attention to detail. Taking the necessary time can produce a much cleaner final result.
Applying PPF Around Difficult Areas
Some parts of a vehicle require significantly more attention than large, flat panels. Front bumpers, mirrors, headlights, door edges, sharp body lines and deep curves can require careful positioning and finishing.
These areas are also important from an appearance perspective because poorly finished edges or misaligned film can be more noticeable. Professional installers therefore pay close attention to these sections throughout the application process.
Front Bumper
The front bumper often has complex curves and multiple contours, making accurate film positioning particularly important.
Side Mirrors
Mirror housings have curved surfaces and tight edges that require careful handling during film application.
Headlights
Headlight protection requires accurate pattern positioning around the shape and edges of the light assembly.
Body Contours
Sharp body lines and deep curves require controlled application so the film follows the vehicle's original design.
Final Alignment Check
After the film has been applied to a panel, the installer checks the overall alignment and appearance before moving to the next area. This allows any necessary finishing work to be completed while the panel is still being worked on.
Once the panel has been properly applied and inspected, the installer can move forward with edge finishing and detailed installation work. This next stage is particularly important for achieving a clean and professional-looking result.
Step 7 – Edge Wrapping, Tucking & Final Finishing
After the protective film has been carefully applied to the vehicle panels, the next stage is detailed edge finishing. This part of the installation is important because the edges, corners and contours of the film can have a major impact on the overall appearance of the finished installation.
A professional installer carefully checks where the film ends on each panel and works to create clean, consistent finishing around suitable edges. Depending on the panel, vehicle design and pattern, the film may be wrapped or tucked around accessible edges to create a more integrated appearance.
Why Edge Finishing Matters
Large panels may look excellent from a distance, but small details around edges and corners can determine how professional the installation appears up close. Proper finishing helps the film follow the vehicle's design while keeping the installation neat and consistent.
What Is Edge Wrapping?
Edge wrapping refers to extending the film around an accessible panel edge where the vehicle design and installation method allow it. Instead of ending the film directly on the visible face of a panel, wrapping can help create a more integrated appearance.
The amount of edge coverage possible varies from one panel to another. Vehicle design, panel construction, available material and the selected pattern all influence how an installer can finish the film.
Inspect the Panel Edge
The installer first examines the edge and surrounding area to determine the most suitable finishing approach. Not every edge can or should be wrapped in exactly the same way.
Position the Film Correctly
Proper positioning is important before finishing begins. The installer checks that the film remains correctly aligned with the panel and its body lines.
Work Around Curves
Curved edges and corners require careful handling because the film must follow the vehicle's shape without creating an untidy or inconsistent finish.
Finish Accessible Edges
Where appropriate, the installer can finish the film around accessible edges to help integrate the protective layer with the panel rather than leaving an unnecessarily obvious transition.
Check Corners & Contours
Corners, body lines and detailed contours are inspected carefully. These areas can reveal alignment or finishing issues more easily than large flat sections.
Inspect the Finished Edge
After finishing, the installer checks the edge again to make sure the film is properly positioned and the area has a clean and consistent appearance.
Why Clean Edges Make PPF Look More Professional
One of the biggest visual differences between a basic installation and a carefully finished installation can be seen around the edges. A well-finished installation follows the natural structure of the vehicle and makes the protective film less distracting from the original design.
This is especially noticeable on bonnet edges, fenders, doors, mirrors, bumpers and other areas where the film meets a visible transition. Careful finishing can help create a cleaner overall appearance.
Cleaner Appearance
Proper edge finishing helps maintain a neat and visually consistent installation across the vehicle.
Better Panel Integration
Suitable edge finishing can help the protective film blend more naturally with the vehicle's original panel design.
Attention to Detail
Careful work around small areas demonstrates the level of precision used throughout the installation process.
What Areas Usually Need Extra Attention?
Some vehicle areas are naturally more challenging because they contain curves, tight corners, complicated shapes or visible transitions. These areas should receive additional inspection during the finishing stage.
Bonnet Edges
The front edge of the bonnet can be highly visible, making accurate alignment and clean finishing important for the overall appearance.
Fender Corners
Fender curves and transitions can require careful film positioning and detailed finishing around the panel shape.
Side Mirrors
Mirror housings contain complex curves and smaller edges, requiring careful attention throughout the installation and finishing process.
Front Bumper
The bumper often contains multiple curves, openings and contours, making it one of the more detailed areas to finish.
Should Every PPF Edge Be Wrapped?
Not necessarily. The ability to wrap or tuck an edge depends on the specific vehicle panel, available access, film pattern and installation conditions. Some edges may have limited access or may require a different finishing approach.
A professional installer should choose the finishing method that is appropriate for each individual area rather than forcing the same technique across the entire vehicle.
Professional Installation Tip
Edge finishing should be performed carefully rather than rushed. Small details around corners and panel edges can have a significant effect on the final appearance of Paint Protection Film .
Final Edge Inspection
Once the edges and corners have been finished, the installer performs a detailed visual inspection of the panel. The film should be checked from different viewing angles and under suitable lighting to identify any areas that require additional attention.
After the edge finishing stage is complete, the installation moves toward its final inspection and finishing process. At this point, the installer checks the overall appearance of the vehicle and ensures that the completed panels meet the expected installation standard.
Step 8 – Final Inspection, Quality Check & Installation Completion
After the film has been applied and the edges have been carefully finished, the final inspection is one of the most important stages of the installation. At this point, the installer examines the completed panels to make sure the film has been positioned correctly and the overall finish meets the expected installation standard.
A professional final inspection is not limited to looking at the vehicle from a distance. The installer carefully checks the film under suitable lighting and from different viewing angles. Edges, corners, panel transitions, curves and the overall appearance are examined before the vehicle is considered ready for completion.
Why the Final Inspection Matters
The final inspection gives the installer an opportunity to identify areas that may need additional attention before the vehicle leaves the installation area. Careful quality control helps ensure that the completed film looks clean, consistent and properly aligned.
What Is Checked During the Final PPF Inspection?
The exact inspection procedure can vary between installers, but a thorough quality check should examine the important visual and installation details across every protected panel.
Film Alignment
The installer checks that the film remains properly aligned with the panel and follows the vehicle's original body lines. Consistent alignment is particularly important around visible edges and design features.
Edges & Corners
All accessible edges and corners are inspected carefully. The installer checks the finishing around panel transitions and confirms that the film has been properly positioned in the areas included in the installation.
Surface Appearance
The finished surface is inspected for overall clarity and consistency. The installer looks across the panel from different angles to identify areas that may require additional finishing.
Curves & Contours
Complex curves and body contours are checked to make sure the film follows the vehicle's shape correctly. These areas often require additional attention because of their geometry.
Panel Transitions
The installer examines where the film transitions from one protected area to another. Consistent finishing helps maintain a professional appearance across the vehicle.
Overall Vehicle Appearance
Finally, the vehicle is viewed as a complete installation. The installer checks whether the protected areas look consistent with the surrounding original paint and whether any visible area needs additional attention.
Checking the PPF Under Different Lighting
Lighting can reveal details that may not be obvious in normal conditions. For this reason, a detailed inspection may involve examining the vehicle under suitable workshop lighting and from multiple angles.
Looking at the film from different directions can help the installer identify issues around edges, curves and panel transitions. This additional inspection is useful because the appearance of a transparent film can change depending on the angle and lighting conditions.
Panel-by-Panel Inspection
Each protected panel should be checked individually rather than inspecting only the vehicle as a whole.
Edge Inspection
Visible and accessible film edges should be reviewed carefully for proper finishing and alignment.
Final Visual Check
The completed installation should be reviewed from different angles and under suitable lighting before completion.
What Happens If an Area Needs Additional Attention?
If the installer notices an area that requires additional attention during the final inspection, that section can be reviewed and finished appropriately before the vehicle is handed back to the owner.
This is one reason why the final inspection is an important part of professional Paint Protection Film installation. It provides a final opportunity to evaluate the completed work instead of assuming that the installation is finished immediately after the film has been applied.
Professional Installation Tip
A good installation should always include a proper final inspection. Do not rush this stage. Reviewing every protected panel carefully can help identify small finishing details before the vehicle leaves the installation area.
Finalizing the Vehicle After PPF Installation
Once the final inspection has been completed and the installer is satisfied with the finished panels, the vehicle can be prepared for handover. The owner should be informed about the appropriate initial care and any instructions specific to the installed film.
The vehicle may require a suitable settling or curing period depending on the film and installation method. During this period, following the installer's aftercare instructions is important.
What Should You Ask Your PPF Installer Before Taking the Car?
Which Areas Were Covered?
Confirm the exact panels and areas included in your selected PPF package.
What Aftercare Is Recommended?
Ask about the recommended washing, cleaning and initial care procedure for the installed film.
When Can the Vehicle Be Washed?
Follow the installer's specific guidance regarding the first wash and any initial restrictions after installation.
What Warranty Applies?
If your PPF package includes a manufacturer or installation warranty, ask the installer to explain its coverage and terms.
PPF Installation Is More Than Just Applying Film
A professional PPF installation involves several stages, from vehicle inspection and deep cleaning to paint preparation, pattern selection, film application, edge finishing and final quality control. Each stage contributes to the overall result.
Choosing a suitable film is important, but installation quality is equally important. Proper preparation and careful workmanship can help the protective film achieve a clean and consistent appearance while protecting the vehicle's original painted surfaces.
Installation Complete
Once the final inspection is complete, your vehicle's PPF installation process is finished. The next priority is proper aftercare and maintenance so the film can remain clean and in good condition over time.
How Long Does PPF Installation Take?
The time required to install Paint Protection Film depends on several factors, including the size of the vehicle, the number of panels being protected, the complexity of the bodywork, the condition of the paint and the preparation required before installation.
A small partial PPF package covering high-impact areas can generally require much less time than a full-car installation. Similarly, a vehicle with clean and well-maintained paint may require less preparation than a vehicle that needs extensive cleaning, decontamination or paint correction.
Installation Time Depends on the Package
There is no single installation time that applies to every vehicle. The installer should evaluate the vehicle and the selected coverage before providing an estimated completion time.
What Factors Affect PPF Installation Time?
Several factors can increase or decrease the amount of time required for a professional PPF installation. Understanding these factors helps vehicle owners set realistic expectations before booking an installation.
Coverage Area
The amount of film being installed is one of the biggest factors. A front bumper or partial front package requires less work than protecting most or all of the vehicle.
Vehicle Size
Larger vehicles such as SUVs can have more surface area and additional bodywork compared with smaller cars. More panels can naturally require more preparation and installation time.
Panel Complexity
Vehicles with complicated bumpers, deep curves, sharp body lines, complex mirrors and detailed body shapes can require additional time for accurate application and finishing.
Paint Condition
A vehicle with clean and well-maintained paint may require less preparation. Older or heavily used vehicles may need additional cleaning, decontamination or paint correction before the film can be installed.
Pattern & Coverage Planning
Selecting the correct patterns and planning panel coverage can also affect the workflow. Complex coverage requirements may require additional preparation before application begins.
Installation Quality
Professional installation should not be rushed simply to reduce completion time. Careful preparation, controlled application and detailed finishing can require additional time but are important for achieving a quality result.
How Long Does Partial PPF Installation Take?
Partial PPF installations are generally focused on selected high-impact areas of the vehicle. These may include the front bumper, bonnet, front fenders, side mirrors or other areas chosen by the vehicle owner.
Because fewer panels are involved, partial installations can normally be completed faster than full-car installations. However, the actual time still depends on the vehicle design, preparation requirements and complexity of the selected areas.
Small Coverage Package
Limited protection focused on specific high-impact areas generally involves fewer panels and a shorter installation process.
Front Protection Package
A front-focused package can include several important areas and therefore requires more preparation and finishing than a single-panel installation.
Extended Coverage
Adding more panels increases the total preparation, application and final inspection required for the installation.
How Long Does Full Car PPF Installation Take?
Full-car PPF installation is a much more extensive process because a large number of vehicle panels need to be prepared, covered and inspected. The installer has to work across different panel shapes, curves, edges and body contours.
The condition of the vehicle also plays an important role. If significant preparation is required before installation, the total project time can increase. For this reason, a professional installer should inspect the vehicle before giving a final completion estimate.
Do Not Rush a Full-Car Installation
Full-car PPF involves many individual panels and detailed finishing work. Trying to complete the installation as quickly as possible can compromise the preparation and attention to detail needed for a professional result.
Does Paint Correction Increase Installation Time?
Yes, if paint correction is required, it can add additional preparation time to the overall project. The amount of additional time depends on the condition of the vehicle and the level of correction required.
Paint correction should not be treated as an automatic step for every vehicle. The installer should evaluate the paint first and determine whether additional correction is appropriate before the protective film is installed.
Why Professional PPF Installation Can Take Time
A high-quality installation involves much more than applying the film itself. The complete process can include inspection, washing, decontamination, paint preparation, pattern selection, film application, edge finishing and final quality control.
Each stage requires attention to detail. Taking sufficient time allows the installer to inspect the vehicle properly and address individual panels according to their specific shape and condition.
Proper Preparation
Adequate preparation helps create a clean surface before the film is applied.
Careful Application
Controlled application allows the installer to work carefully around curves and complicated panel shapes.
Detailed Inspection
Additional time for final inspection helps identify areas that may need attention before completion.
Should You Leave Your Car at the Installation Studio?
Depending on the size and complexity of the installation, the vehicle may need to remain at the installation studio while the work is completed. This allows the installer to follow the complete preparation and finishing process without rushing.
Before booking, it is a good idea to ask the installer for an estimated completion window based on your specific vehicle and selected PPF coverage. This can help you plan transportation and avoid unnecessary waiting.
Professional Tip
Ask for an installation estimate after the installer has inspected your vehicle and confirmed the coverage package. Avoid choosing an installer based only on who promises the fastest installation.
Installation Time vs Installation Quality
When choosing a PPF installer, completion time should not be the only consideration. Proper preparation, accurate application, clean edge finishing and final quality inspection are all important parts of the process.
A professional installation may take longer because the installer is carefully completing each stage instead of rushing through the work. The goal should be a clean, properly finished result rather than simply completing the job as quickly as possible.
What to Do After PPF Installation?
The installation process does not completely end when the film has been applied to the vehicle. The first few hours and days after installing Paint Protection Film are also important for allowing the film to settle properly on the vehicle surface.
During the initial period, vehicle owners should follow the installer’s aftercare instructions and avoid unnecessary washing, aggressive cleaning or activities that could disturb the newly installed film. Proper initial care can help maintain the appearance of the installation while the adhesive continues to settle.
The First Few Days Matter
Newly installed PPF should be treated carefully. Follow the specific curing and aftercare instructions provided by your professional installer because drying and settling conditions can vary depending on the film, installation method and environment.
What Should You Do During the First 24 Hours?
The first 24 hours should generally be treated as an initial settling period. Avoid unnecessary contact with the newly installed panels and allow the installer’s recommended process to take place.
Avoid Washing the Vehicle
Do not immediately take the vehicle for a regular car wash unless your installer specifically advises that it is safe. Freshly installed film may require time to settle.
Avoid High-Pressure Water
Strong water pressure around fresh film edges can be undesirable during the initial period. Follow the installer’s recommended waiting time before pressure washing.
Do Not Rub the Film
Avoid unnecessary rubbing, wiping or polishing of freshly installed panels. Give the film time to settle before performing routine maintenance.
Keep the Vehicle Clean from Contact
Try to avoid activities that may cause dirt, debris or other material to stick to or scrape against the newly installed areas.
Avoid Opening & Closing Against Fresh Edges
Areas around doors, edges and other moving parts should be treated carefully so that newly finished film edges are not unnecessarily disturbed.
Follow Installer Instructions
Your installer knows the exact film and installation conditions. Their specific aftercare instructions should take priority over general recommendations.
Can You Wash Your Car Immediately After PPF Installation?
It is generally better not to wash a newly installed vehicle immediately unless the installer has specifically approved it. The recommended waiting period can depend on the film, adhesive system, installation conditions and environmental factors.
When the vehicle is ready for its first wash, use a gentle cleaning method and avoid aggressive pressure directly against film edges. A professional installer can provide the correct washing instructions for the specific film installed on your vehicle.
Before Your First Wash
Confirm with your installer when the vehicle can safely be washed and whether there are any special instructions for pressure washing, automatic car washes, drying or chemical products.
What Happens to PPF During the Initial Settling Period?
After installation, the film may continue settling against the vehicle surface. Depending on the installation method and environmental conditions, small visual changes can occur as the installation stabilizes.
This is one reason why the vehicle should not be judged only by its appearance immediately after leaving the installation studio. If you notice a concern, contact the installer before attempting to correct the area yourself.
What Should You Avoid After PPF Installation?
The goal during the initial period is simple: minimize unnecessary physical and chemical stress on the freshly installed film.
Aggressive Washing
Avoid harsh washing methods immediately after installation.
Strong Pressure Near Edges
Avoid directing strong water pressure toward fresh film edges.
Harsh Chemicals
Do not use unfamiliar or aggressive chemicals on newly installed film.
Unnecessary Polishing
Avoid polishing or machine correction until the installer confirms it is appropriate.
When Can You Start Normal PPF Maintenance?
Once the installer confirms that the film has sufficiently settled, normal maintenance can begin. Regular maintenance should focus on gentle washing, clean drying techniques and using products that are compatible with the installed film.
Maintenance should be consistent rather than aggressive. Frequent gentle cleaning is generally preferable to allowing heavy dirt, road contamination and other residues to remain on the surface for extended periods.
Gentle Washing
Use a suitable washing method and avoid unnecessarily aggressive contact with the film.
Clean Drying
Dry the vehicle using clean, appropriate materials and avoid dragging contaminated towels across the surface.
Regular Inspection
Periodically inspect the film, especially around edges, corners and high-impact areas.
What If You Notice Small Bubbles or Water Marks?
Depending on the installation process, small visual imperfections may sometimes be noticed shortly after installation. Do not immediately try to lift, press, cut or reposition the film yourself.
If something looks unusual, the safest approach is to contact the professional installer and allow them to inspect the area. They can determine whether the appearance is part of the normal settling process or requires additional attention.
Do Not Try to Fix Fresh PPF Yourself
Avoid lifting corners, pushing tools under the film, cutting the surface or attempting to reinstall a fresh section yourself. Improper handling can damage the film or paint and may also affect the installation warranty.
How Should You Protect PPF From Contamination?
After the initial settling period, keeping the film clean becomes an important part of long-term maintenance. Road grime, bird droppings, tree sap, insects and other contaminants should not be allowed to remain on the surface unnecessarily.
When contaminants are difficult to remove, avoid aggressive scrubbing. Use a suitable cleaning method or ask your installer which products are recommended for the specific film.
Does Weather Affect Newly Installed PPF?
Environmental conditions can influence how an installation settles. Temperature, humidity, sunlight and other conditions can affect the installation process and the time required for the film and adhesive to stabilize.
Because conditions vary, the installer’s specific recommendations should be followed rather than relying on one fixed aftercare schedule for every vehicle.
Professional Tip
Before leaving the studio, ask your installer three simple questions: When can I wash the car? Which cleaning products should I use? And when can normal maintenance begin? Keeping these instructions can help you care for the film correctly from day one.
Initial PPF Aftercare Checklist
Use this simple checklist after your installation to help protect the freshly installed film during the initial period.
Proper Aftercare Helps Protect Your Investment
Installing Paint Protection Film is an investment in protecting the vehicle’s painted surfaces. Proper initial aftercare helps ensure that the freshly installed film receives the right treatment while it settles.
Once the initial period has passed, consistent washing, careful drying and regular inspection can help maintain the film’s appearance and protective performance over time.
PPF Installation Is Complete — Now Maintain It Correctly
A professional installation is only the beginning. Following the correct initial aftercare instructions and maintaining the film properly can help keep your vehicle looking clean and protected for the long term.
Professional PPF Installation vs DIY: Which Is Better?
Installing Paint Protection Film may look simple when watching an experienced installer work, but achieving a clean and long-lasting result requires proper preparation, accurate film positioning, controlled application and detailed finishing.
Some vehicle owners consider installing PPF themselves to reduce installation costs. DIY installation can be possible for experienced users working with suitable materials and tools, but it can also be challenging, especially on complex vehicle panels such as bumpers, mirrors, curved fenders and other difficult areas.
Installation Quality Matters
The quality of the final result depends not only on the film itself but also on surface preparation, installation technique, pattern accuracy and finishing. A premium film cannot automatically compensate for poor installation.
What Is Professional PPF Installation?
Professional installation is performed by an installer who has experience working with protective films, vehicle surfaces, installation solutions, patterns and different body shapes. The process normally includes vehicle inspection, washing, decontamination, preparation, pattern selection, film application, edge finishing and final inspection.
A professional installer can also identify potential problems before the film is applied, such as damaged paint, previous repairs, contamination or areas that may require additional preparation.
What Is DIY PPF Installation?
DIY PPF installation means purchasing the film and attempting to install it yourself without using a professional installation studio. This approach can reduce labor costs, but the vehicle owner becomes responsible for preparation, positioning, application and finishing.
DIY installation may be more manageable on small, relatively flat panels. However, larger panels and complicated bodywork can be significantly more difficult because the film needs to conform to curves and contours while maintaining proper alignment.
Professional Installation vs DIY PPF
Why Is DIY PPF Installation Difficult?
The biggest challenge with DIY installation is controlling the film while applying it to a three-dimensional vehicle surface. The film must be positioned correctly while avoiding unwanted wrinkles, excessive stretching, contamination and alignment problems.
An experienced installer develops the ability to understand how the film behaves on different surfaces. This experience can make complicated areas easier to manage and can reduce installation mistakes.
Film Positioning
Positioning the film accurately is important. A small alignment error can become more noticeable as the film is applied across a large panel.
Controlling Tension
Excessive or uneven stretching can create installation problems. Learning how to control tension requires practice and experience.
Managing Curves
Curved panels can be challenging because the film needs to conform to the vehicle's shape without creating unnecessary distortion or wrinkles.
Working Around Edges
Edges and corners require careful finishing. Poorly managed edges can become visible and may be more vulnerable to lifting or contamination.
Keeping the Surface Clean
Dust, dirt, hair and other contamination can become trapped between the film and paint during installation.
Final Appearance
Achieving a clean appearance across the entire panel requires careful application and detailed inspection after installation.
What Are the Main Benefits of Professional PPF Installation?
Professional installation provides more than simply saving time. The installer brings experience, specialized tools and knowledge of how protective film behaves on different vehicle surfaces.
Better Preparation
Professional preparation helps ensure the surface is clean and suitable before the film is applied.
Accurate Application
Experienced installers can work carefully around panel shapes, curves and body lines.
Cleaner Edges
Proper finishing can make installed film less noticeable around accessible edges and corners.
Less Installation Risk
Professional experience can reduce common mistakes associated with positioning, stretching and handling the film.
Can DIY Installation Damage the Paint?
The risk depends on the installation method, tools, film and the skill of the person performing the work. Incorrect preparation or aggressive handling can create problems, particularly when working around existing paint damage or repaired panels.
Removing incorrectly installed film can also become difficult if the installation has been handled improperly. For valuable, new or luxury vehicles, professional installation can provide additional peace of mind.
Important Before Attempting DIY Installation
If you are inexperienced with automotive film installation, avoid experimenting on a large or expensive vehicle panel. Learning on a small practice piece or seeking professional guidance can help reduce the risk of costly mistakes.
What Tools Are Needed for DIY PPF Installation?
DIY installation generally requires more than just the film itself. Proper tools can make the application process easier, but having tools does not replace the experience required to use them correctly.
Squeegee
Used to help control the film and move installation solution during application.
Microfiber Towels
Useful for cleaning and drying surfaces before and during the installation process.
Spray Bottles
Used for preparing and applying the appropriate installation solution.
Installation Tools
Additional specialized tools may be needed for edges, contours and difficult areas.
Is DIY PPF Cheaper?
DIY installation can reduce labor costs because the vehicle owner performs the installation. However, the total cost should also include tools, material waste and the possibility of replacing film if an installation attempt fails.
Professional installation costs more because you are paying for preparation, labor, experience, equipment, finishing and quality control. For many vehicle owners, the additional cost can be worthwhile when the goal is a clean and professionally finished result.
DIY Cost Considerations
Film + tools + preparation + possible material waste + your own time.
Professional Cost Considerations
Film + professional preparation + installation labor + finishing + final inspection.
When Does DIY PPF Make More Sense?
DIY installation may be more suitable for someone who already has experience with automotive films, has the appropriate workspace and tools, and is comfortable working carefully on vehicle surfaces.
It can also be useful for small experimental projects or limited areas where the installer has enough experience to control the material properly.
When Should You Choose Professional Installation?
Professional installation is generally the safer choice when protecting a new, expensive, luxury or difficult-to-work-on vehicle. It is also preferable when you want a consistent finish across multiple panels and professionally finished edges.
New Vehicle
Professional installation can help protect a new vehicle while minimizing installation mistakes.
Luxury Vehicle
High-value vehicles can justify professional preparation and installation.
Full-Car Coverage
Larger installations involve more panels and greater complexity than small DIY projects.
Complex Bodywork
Bumpers, mirrors, curves and complicated contours can benefit from experienced installation.
Professional Installation Is About More Than Speed
A professional installer should not simply aim to finish the vehicle as quickly as possible. Proper preparation, controlled application, clean edges and final inspection are all important parts of a quality installation.
The best installation is one where the film provides the intended protection while maintaining a clean appearance and minimizing unnecessary visual distractions.
Professional Tip
If you are comparing DIY and professional installation, compare the complete cost and expected result rather than looking only at the installation labor price. Film quality, preparation, experience and finishing can all influence the final outcome.
Final Verdict: Professional or DIY PPF?
DIY PPF installation can be an option for experienced enthusiasts working on suitable projects, but it requires patience, preparation, tools and practice. For most vehicle owners who want a clean and professionally finished installation, professional installation is the more practical choice.
The decision should ultimately depend on the vehicle, coverage area, installation complexity, experience level and the importance you place on the final appearance.
Choose Quality Over Shortcuts
Whether you choose DIY or professional installation, proper preparation and careful application are essential. When protecting your vehicle, the installation quality should be considered just as carefully as the film itself.

